

How To Import A Blender Animation To Imovie
Blender Video Sequence editing
In that location are many unlike means of making an animation from a sequence of images. For Mac OS X, there is, eastward.g., a workflow using iMovie. Nevertheless, a platform-contained method is provided past Blender. Here, I'1000 assuming yous have generated an epitome sequence externally and want to catechumen it to a movie. As an additional complication, in that location is i particular frame that I desire to exist visible longer than the others. I likewise chose a not-standard attribute ratio for my images, then that iMovie with its express option of three screen ratios wasn't an option. Blender lets you customize frame delay, aspect ratio, resolution and practically annihilation else y'all tin can think of.
I'k assuming Blender versions to a higher place ii.5 hither. The user interface looks quite unlike from the older versions, and it takes some adjustment. For example, splitting a window to become boosted views is no longer done by right-clicking at capricious locations on the edge of the view. Instead, you have to drag the corner ![]() past the little triangle.
past the little triangle.
Although I'chiliad writing these notes mainly for myself, I would highly recommend Blender for its excellent video and image export capabilities, even if you do non utilize it for anything else. The keyboard shortcuts in Blender were ever a big obstacle for newcomers, only in new versions it's getting easier to find deportment in the many popular-up menus without having to recall keyboard shortcuts.
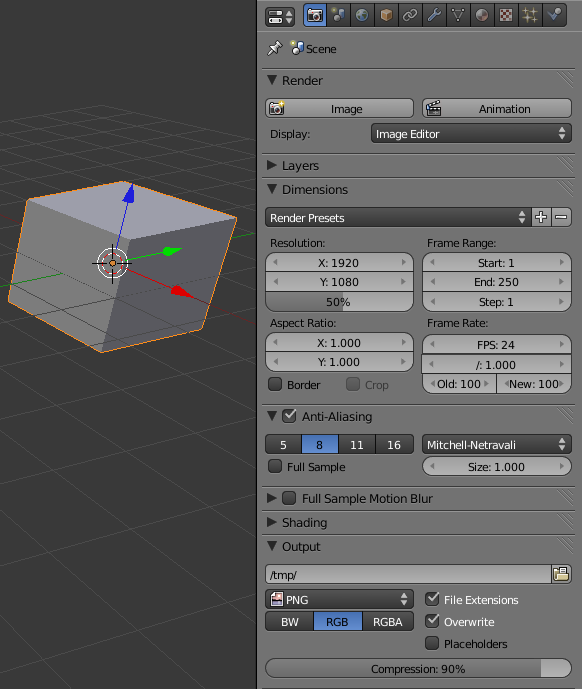
When you start up Blender, the default view shows a 3D cube (see the screenshot on the right). Nosotros won't need to do anything with this, just y'all will already observe the console called "Return" on the right. These controls volition have to be adapted to export our moving-picture show. The start thing is to go out of the 3D view and into the video editor.
If yous don't run across the buttons (including "Animation") shown in the screenshot, make certain you get-go activate the Scene panel by clicking the camera icon at the top of the screenshot.
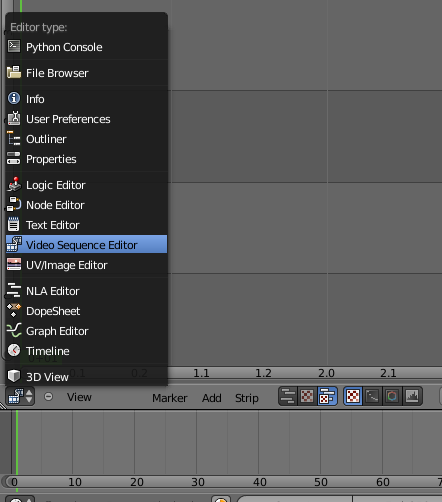
- To start putting images together into a movie, open the "Video Sequence Editor" by clicking on the
 icon at the bottom right corner of the main 3D view:
Also select the display selection
 highlighted at the bottom right of the screenshot, so that y'all volition see a preview render window on acme of the sequencer pane.
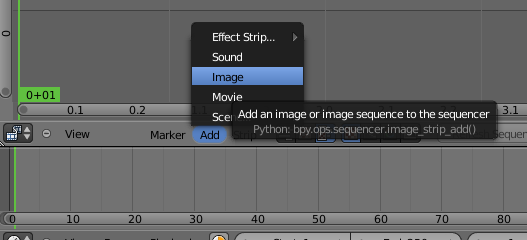
 - To import the nonetheless images for our picture, go to the
Add togethermenu button and selectImage:
-
Select the range of images that you desire to include in the movie (here I typed
Bto get the "border-select" rectangle — shortcuts similar this come from the 3D modeling toolbox):
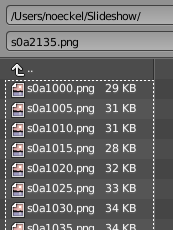
Later on selecting the images, they are highlighted:

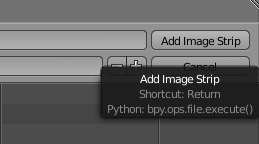
and we're prepare to press "Add Prototype Strip":
- The imported images form a movie strip indicated past a rectangle:
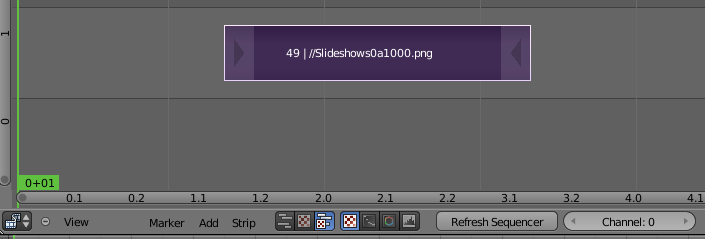
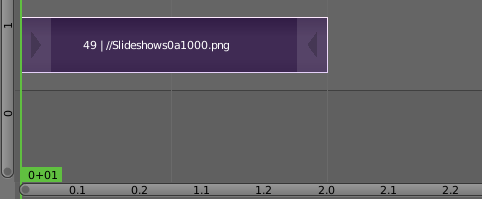
Select the rectangle by right-clicking, and motion information technology and then that it starts at the desired frame (here one) by pressingKand and so moving the mouse. The final position is accepted by left-clicking. - Hither nosotros have moved the strip into identify:
The vertical greenish line indicates the electric current frame, and it tin be dragged to whorl through the movie. When you do so, the preview will show the movie; an example is shown in the next screenshot below. -
Now let'southward come across how to extend one item frame over a longer menstruum of time. In my example, in that location's a single frame somewhere nearly the middle of the movie that I'd like to be visible for longer. At the desired frame (visible in the preview window at the elevation), select
hard cutto create 2 separate strips, divided by the electric current frame (so that the current frame is at the start of the second chunk). So if the frame you lot're trying to extend is number1, you have to cut at frame2!
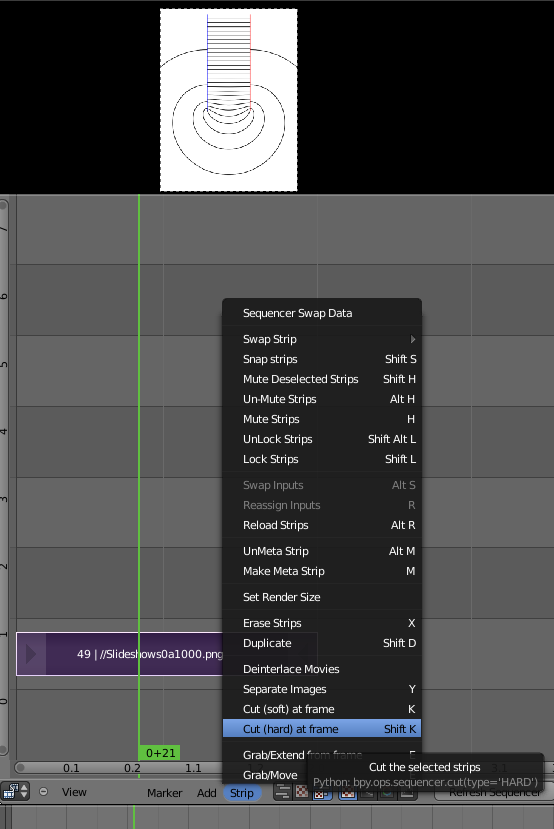
The "soft cut" option volition not work here because it leaves both fragments with all frames of the original. The "cutting" frames are simply hidden and would re-appear in the following steps. - After cutting the strip in two, you tin select the right-paw function by right-clicking on its heart. To move it, printing
Gand swipe the mouse until at that place is a gap of the desired size between the 2 fragments (this gap will be filled with the yet frame at which we made the cutting):
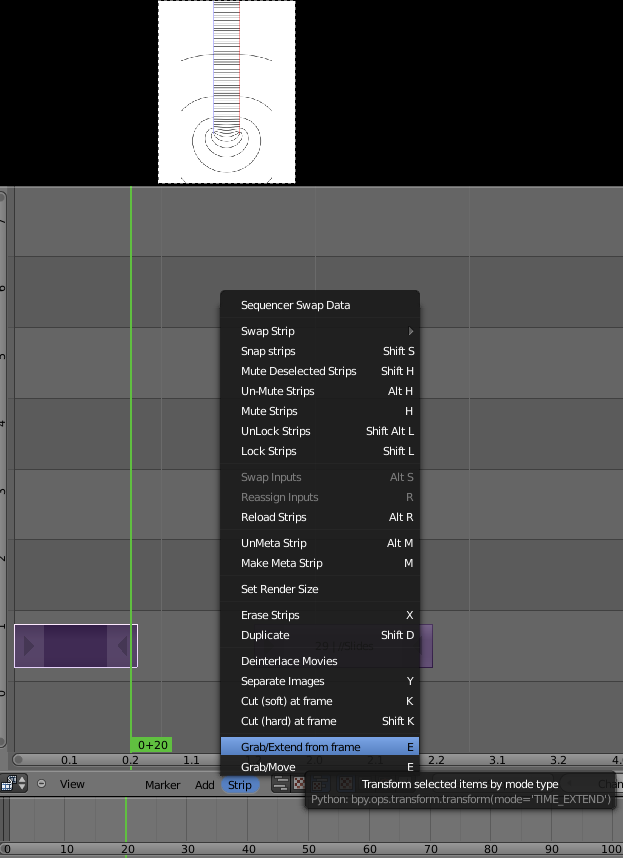
- Go to the concluding frame of the first strip by moving the playhead (green line) at that place. The final frame is shown in the preview, and its duration will exist etxrended if we now take hold of the frame and drag it to the right (the
Eshortcut comes from the analogous "extrude" operation in the 3D editor):
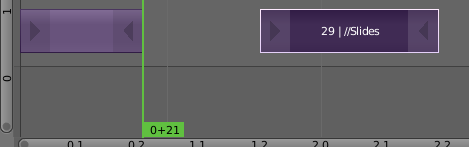
- Scrub the greenish vertical line to the final frame and read off the frame number as shown at the bottom right of the screenshot (
68in this example):

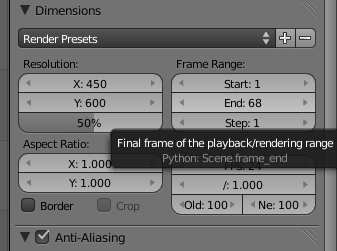
- Now nosotros put the number of frames in as the "End" value of the
Frame Range:
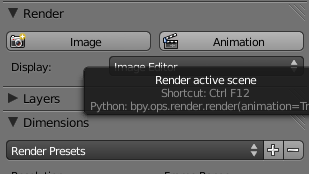
- Before rendering the blitheness, we have to cull the output format (Quicktime) and settings:

The file is located in my home directory. In Blender, the//in a file path stands for the directory in which the blend file has been saved – and if the file hasn't been saved yet,//defaults to the domicile directory. - To render and export the animation, click "Animation":
Jens Nöckel
Last modified: Monday Dec 26 20:29:38 PST 2011
Source: https://pages.uoregon.edu/noeckel/BlenderVideo.html
Posted by: tathamferamplon.blogspot.com
0 Response to "How To Import A Blender Animation To Imovie"
Post a Comment